
.png)


PAGE CONTENTS
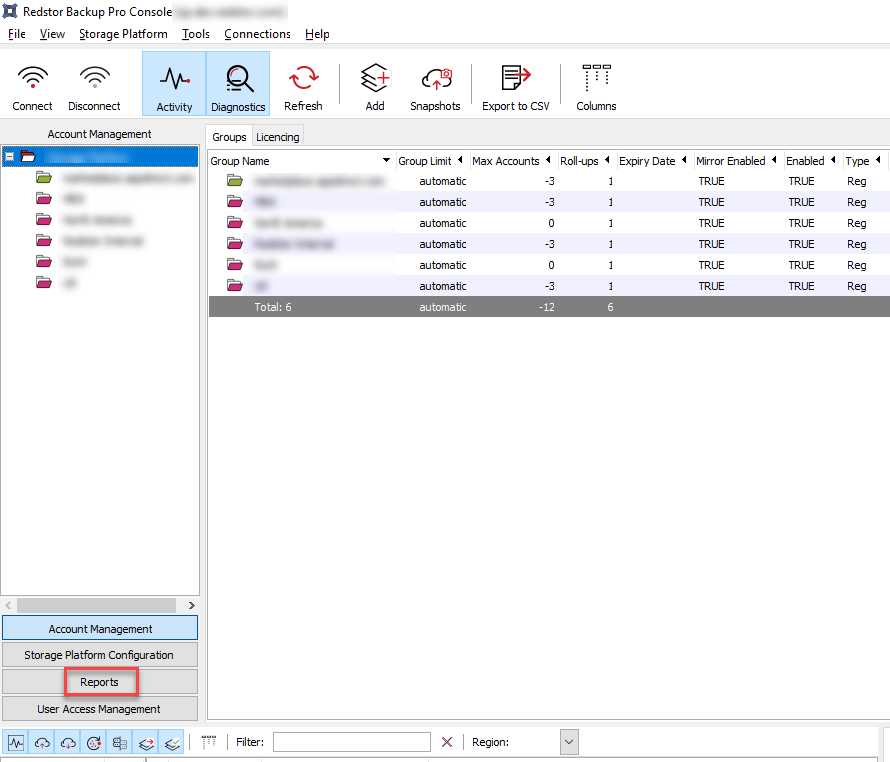
Redstor's Storage Platform Console offers two types of reporting: Enterprise and Standard. The Enterprise Reports functionality is installed by default and can be used by any Administrator, while Standard Reports are only for customers with self-hosted platforms. This article relates to Enterprise Reports. Read more about Standard Reports here.
Selected reports can also be scheduled and run directly from the RedApp. See Article 1633.
How to run an ad hoc report
To run a report, right-click on the collection/group/account name in the work area and expand Reports. Hover over the report template name and click Run report.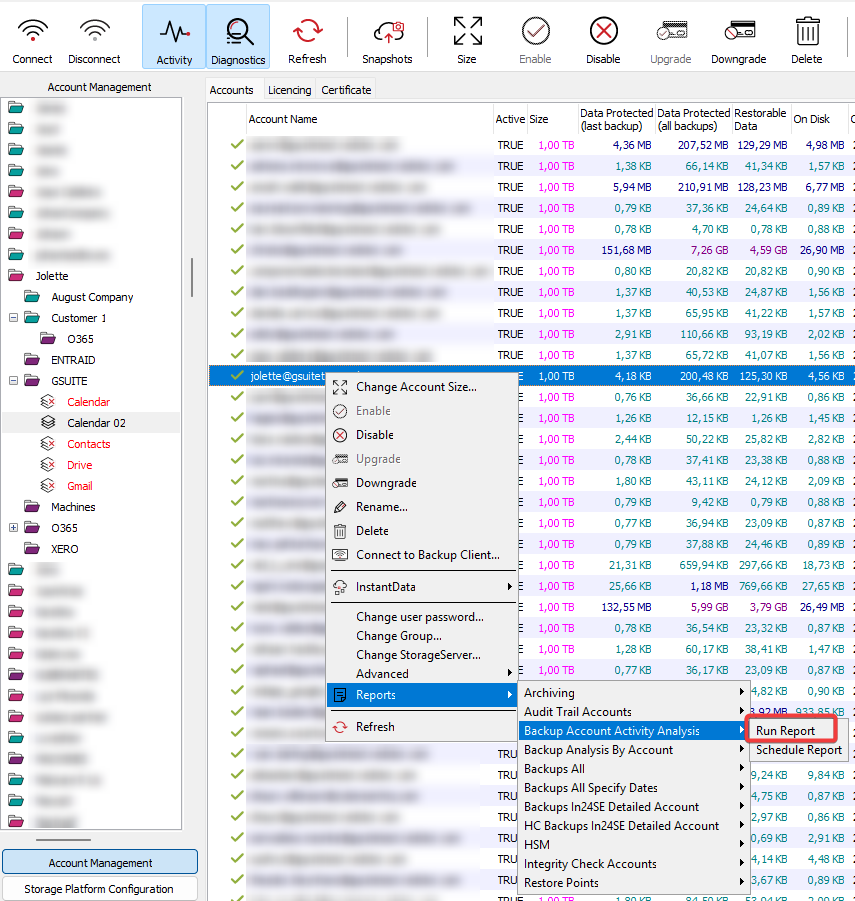
Note:
- Not all available report templates are listed in the context menu.
- The contents of the reports you are able to schedule will be dependent on your user permissions.
How to schedule a recurring email report
1. In the the Account Management view, right-click on the collection/group/account name in the work area and expand Reports. Hover over the report template name and click Schedule report.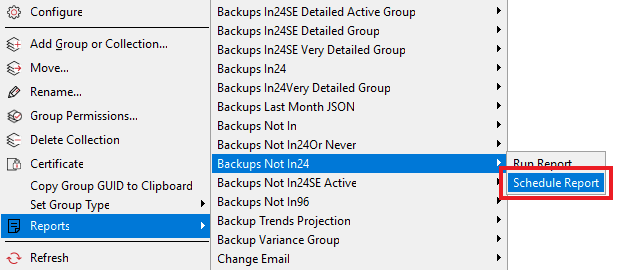
Note:
- Not all available report templates are listed in the context menu.
- The contents of the reports you are able to schedule will be dependent on your user permissions.
2. From the drop-down menu in the window that opens, select the specific report template you want.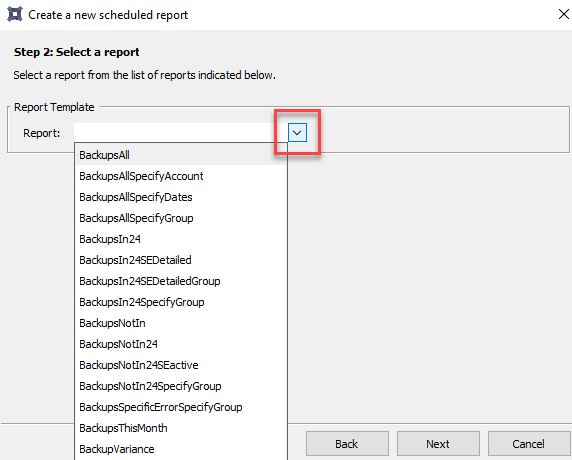
3. Provide a name and description for the report you are scheduling. The name and description can be specific to your operational requirements and do not have to match the report template name. Then click Next.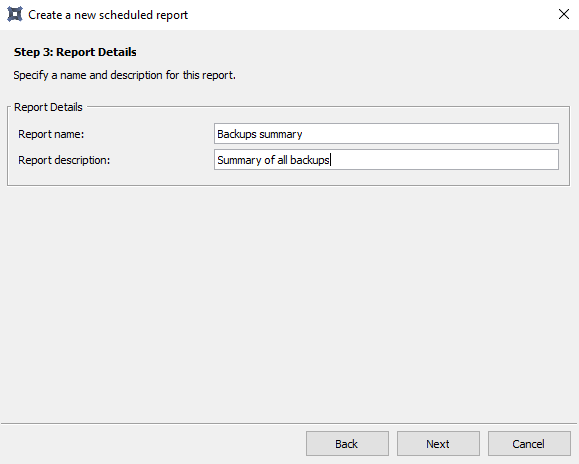
4. Depending on the report template, you may need to specify parameters for the report. If the report you are scheduling requires a collection/group/account to be specified, be sure to enter its complete path (e.g. Staff\All\Backups), otherwise the report will not work. If you do not have the path to hand, consider scheduling the report directly from the Account Management view, as described above.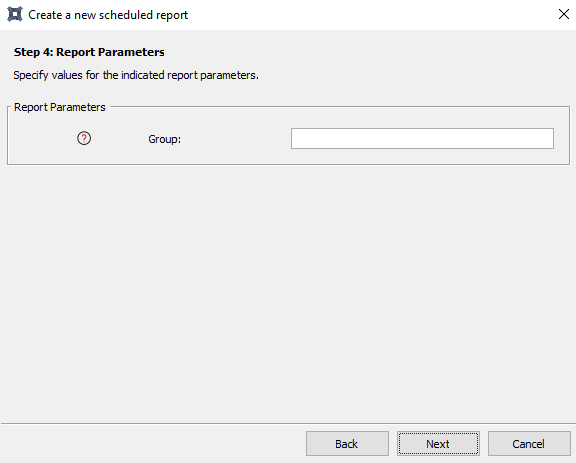
5. Specify the schedule for when the report should be generated. Note that the time must be specified in Universal Coordinated Time (24-hour time).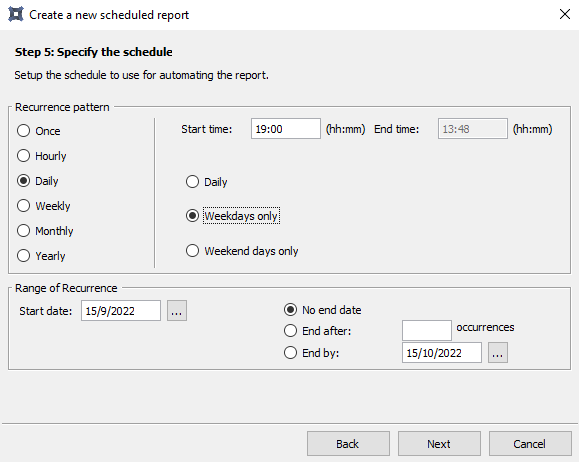
6. Specify the delivery method for the report. Use the Add button to specify the addresses where the report should be emailed. Multiple email addresses should be separated with semicolons.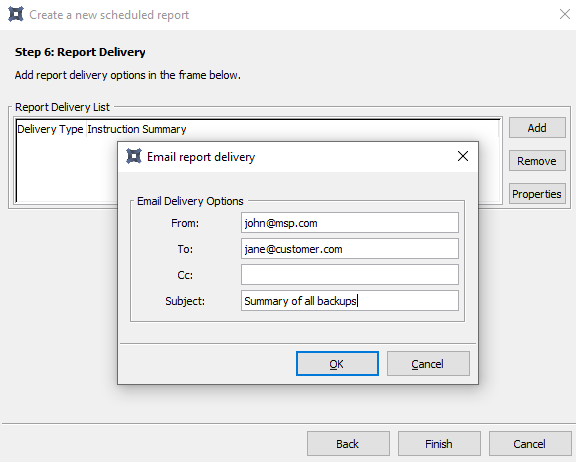
All scheduled reports are displayed in the Scheduled Reports tab in the work area. Click on a category on the left to see the reports for that category.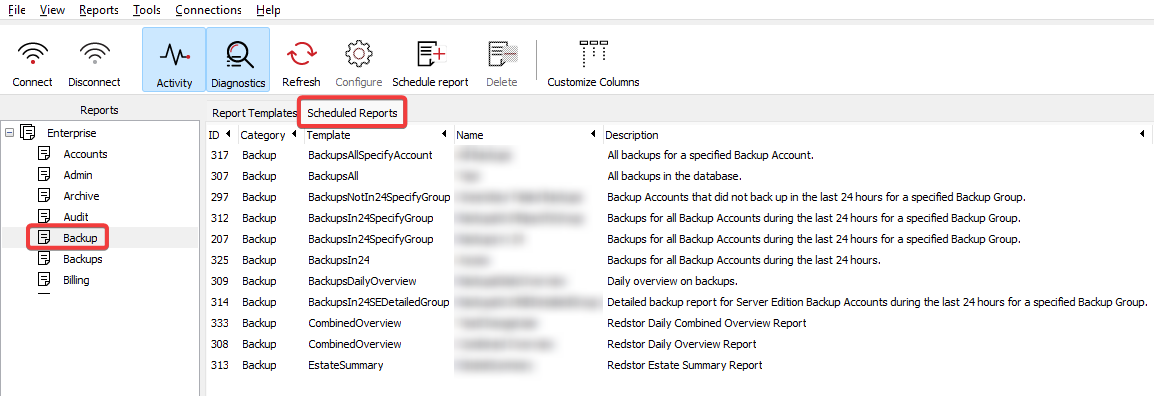
To modify or delete an existing scheduled report, right-click the report name and choose Configure or Delete. There are also buttons for these actions on the main toolbar at the top.
Note: Click on the Customize Columns button on the toolbar to hide unnecessary columns so you can see report details more easily.
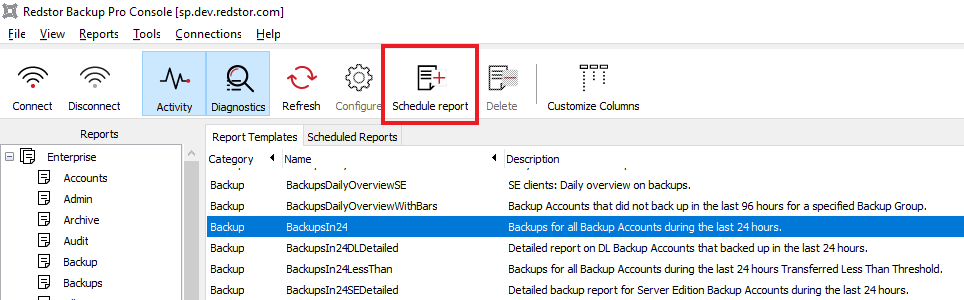
If the report you need is for all collections/groups, or is not listed in the context menu as shown above, you can schedule the report from the the Reports view in the Storage Platform Console.
In the work area to the right, right-click the name of the report you want to schedule and choose Schedule Report, or left-click the report name and click the Schedule report button on the toolbar.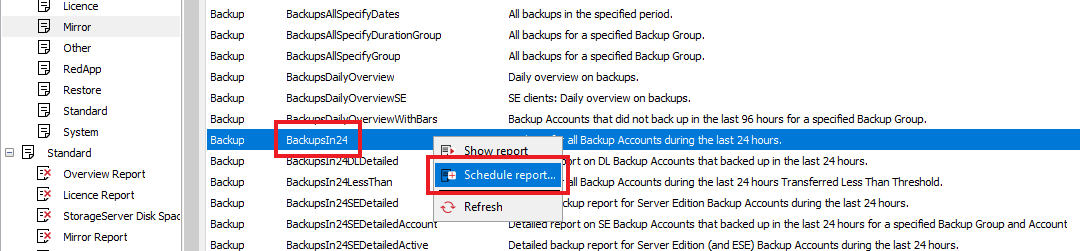
You can also right-click on one of the report categories in the sidebar and go to Schedule report.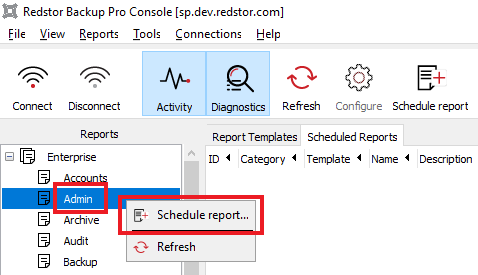
 1.png)